TL;DR: DIY home automation is ezpz with nothing more than a stepper motor, an esp32, and a high tolerance for Jank.
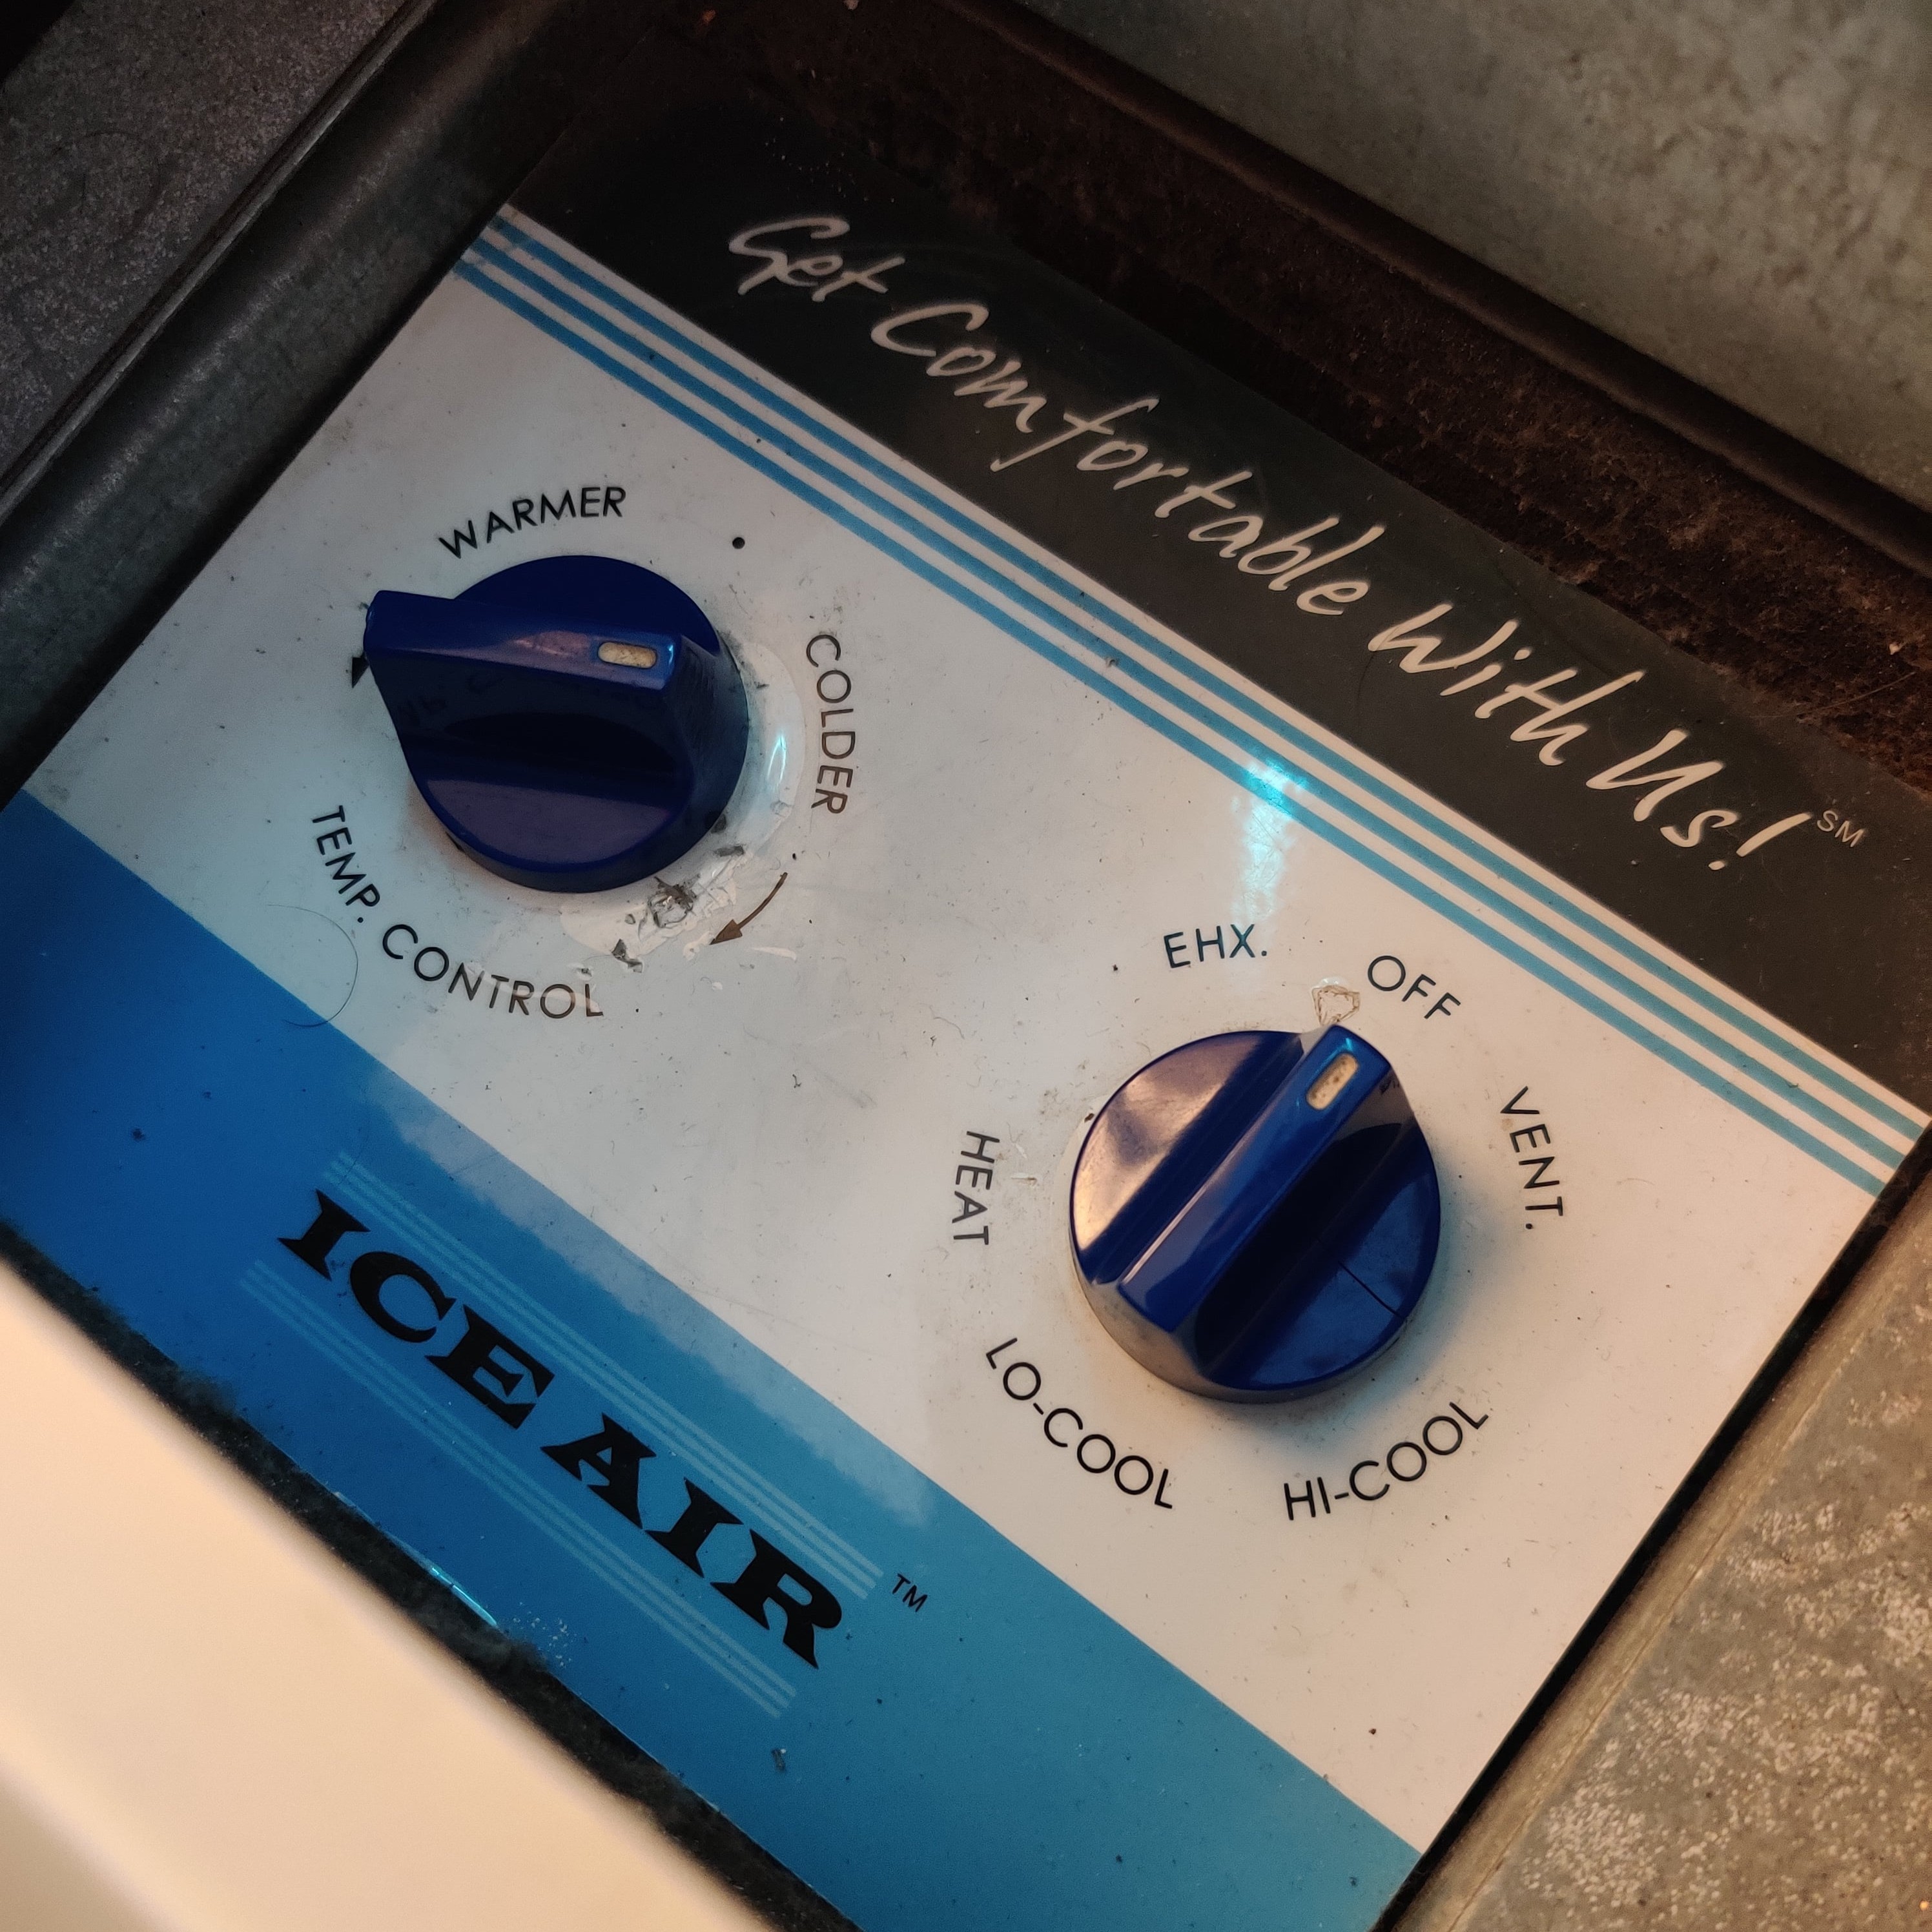
My rental apartment’s AC unit can only be controlled using these retro-looking analog knob-based controls, mounted right onto the unit. No separate wall-mounted thermostat, no remote control… nothin’ fancy whatsoever.
These knobs work… but having to constantly stand up and fiddle with them gets annoying pretty quick.
Fortunately, there’s an ‘ol Prilik family saying that goes something like this: “remember son - the hardest problems in life can usually be solved with nothing more than a stepper motor, an esp32, and a dream”1
And sure enough, after dropping ~$15 on parts, waiting for things to arrive from China, and spending a few hours iterating on the hardware assembly and firmware… I hacked together this beautiful mess:
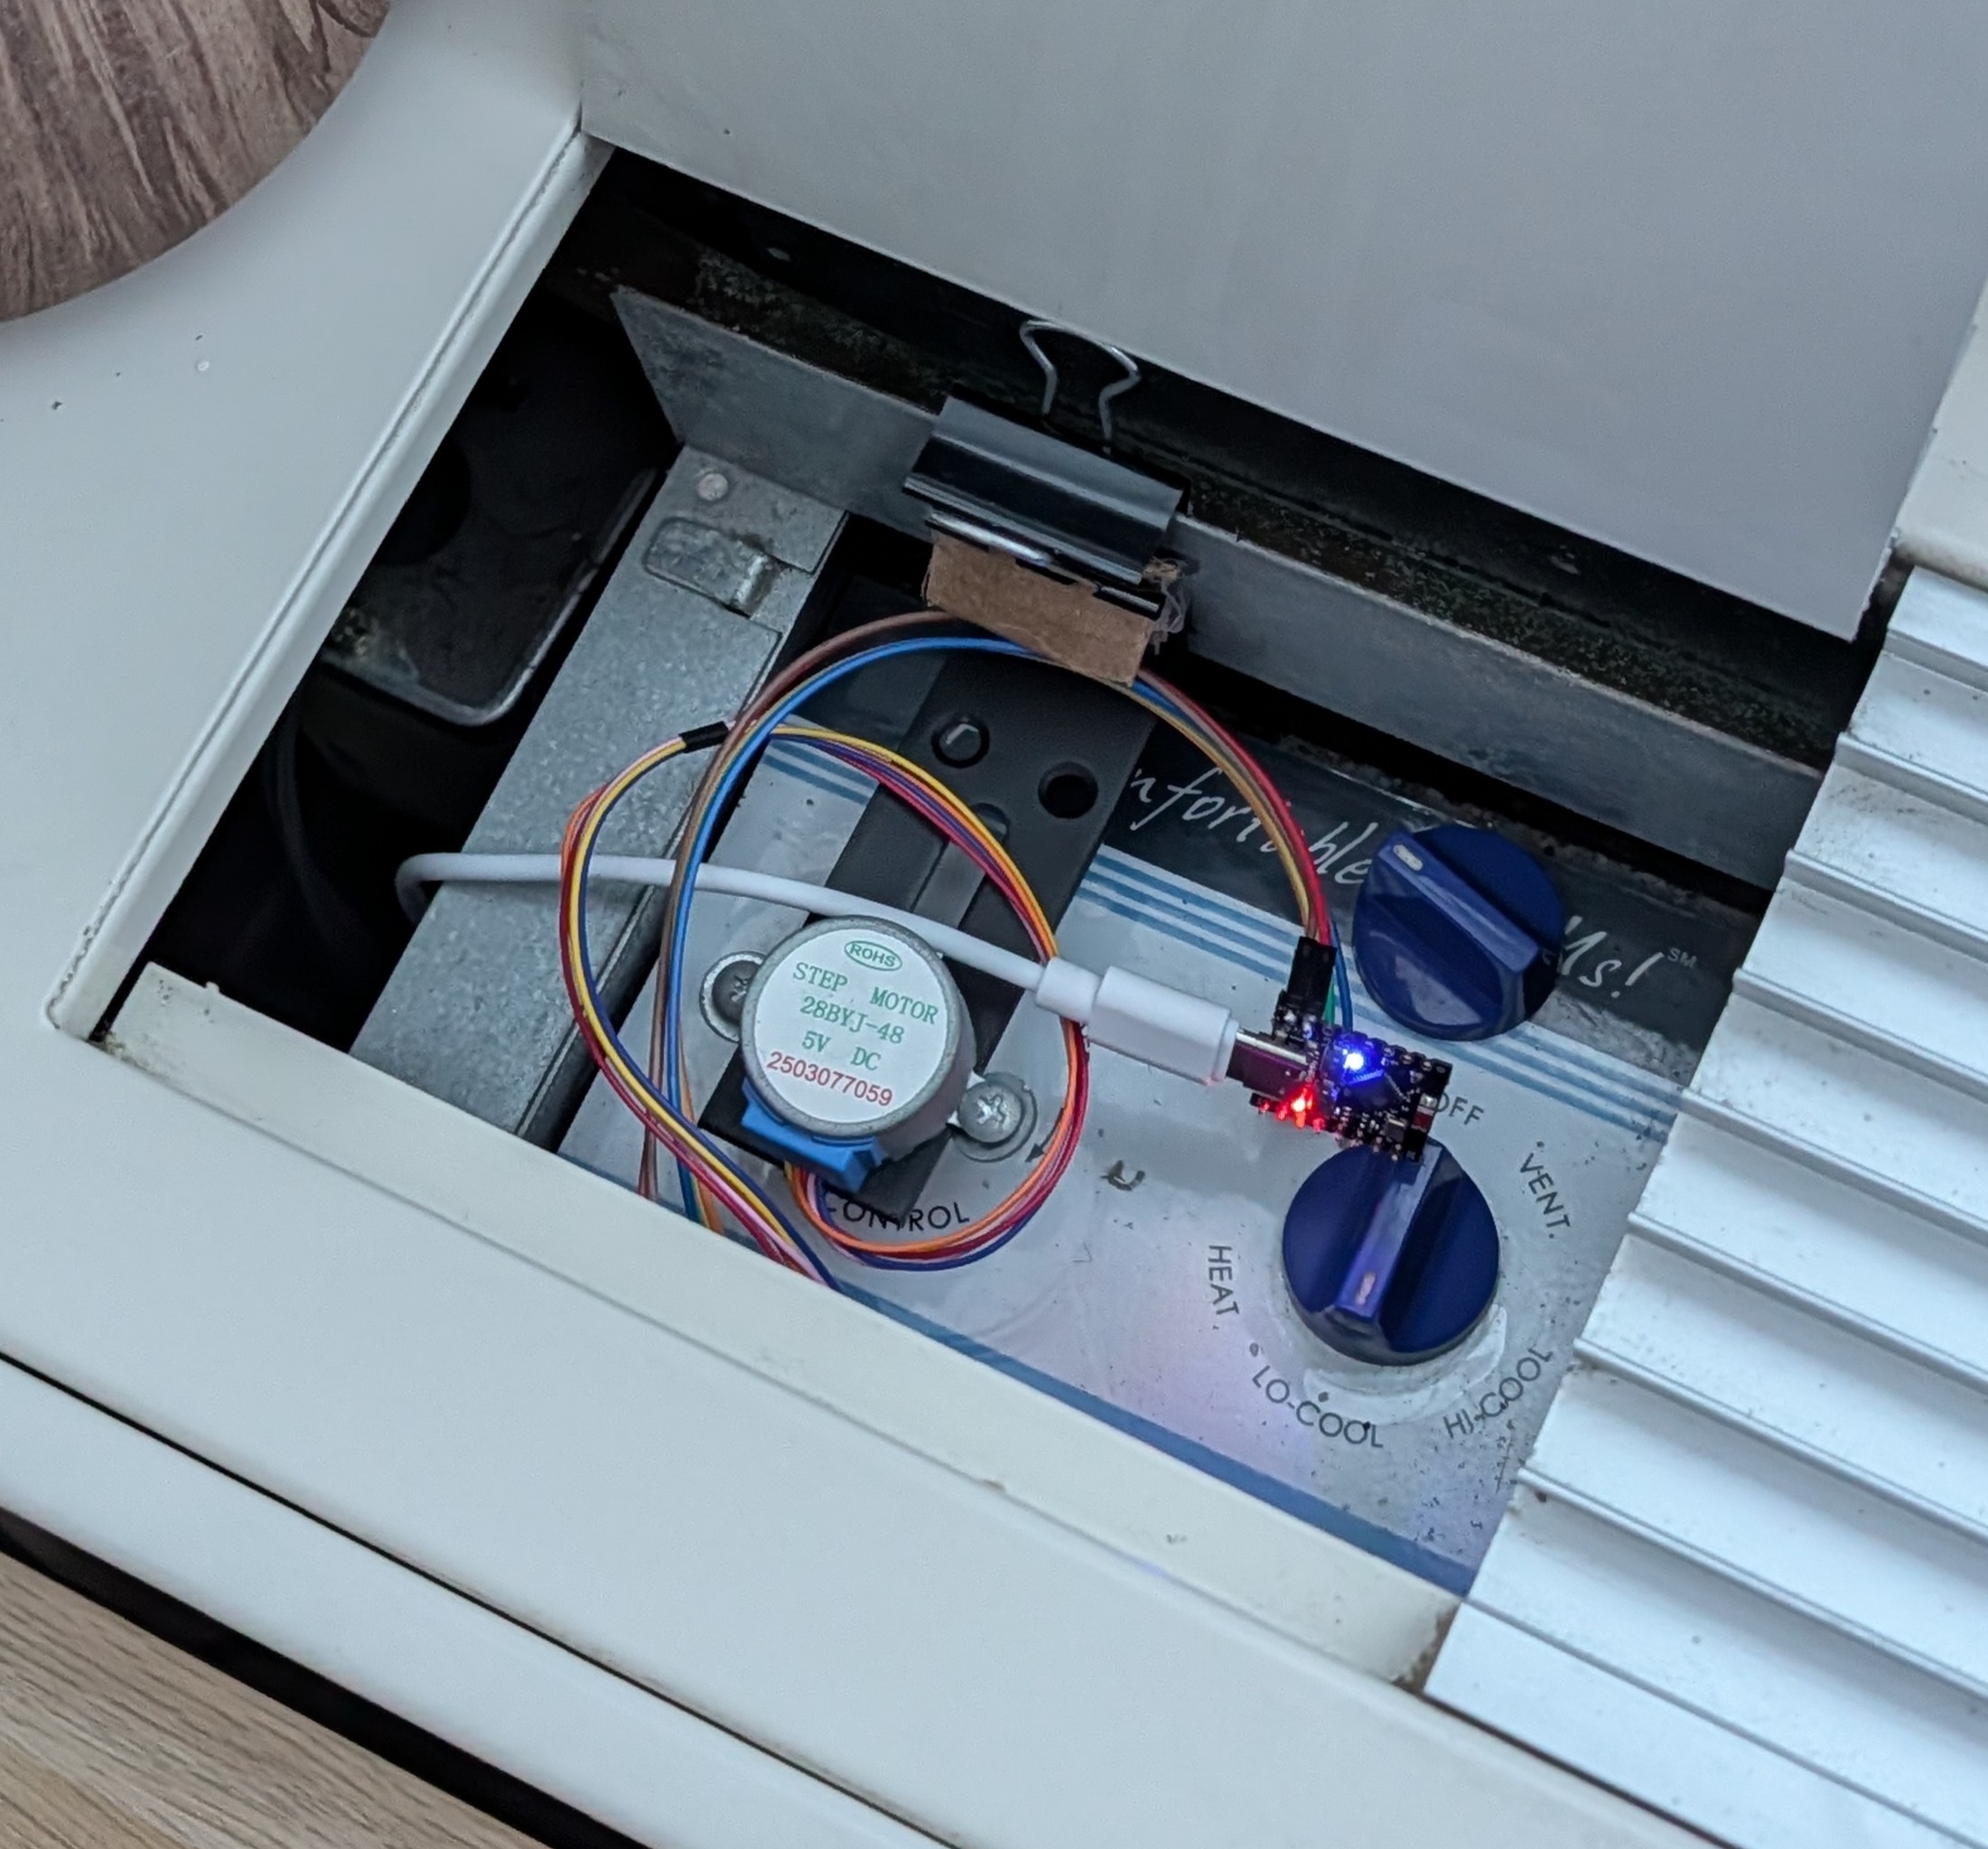
What you’re looking at here is a jerry-rigged esp32-controlled stepper motor, coupled to one of my AC unit’s knobs using a shaft coupler, all affixed to the AC’s back-plane using a cheap L-bracket and a binder clip (with some industrial-grade cardboard padding for good measure).
This whole MacGyver’d up contraption talks to my Home Assistant instance over MQTT, which turns the AC unit on/off based on the state of a temperature sensor located in the same room.
Et voila 🪄 ✨
Just like that - I’ve managed to free myself from the shackles of having to get up off the couch just to tweak my AC!
For all you professional embedded and mechatronics folks out there: I strongly suggest you stop reading here.
The rest of this blog post is a walkthrough of a software engineer’s approach to home automation and building custom hardware, and let me tell you: both the final product, and the journey to get there, are hella jank.
That said… if you’re not afraid of a bit of jank: read onwards, and join me on this fun foray into how I managed to hack together some totally bespoke home-automation hardware with almost no budget, or experience!